Windows PC 本地搭建 localGPT(2024年5月,国内)
关于 localGPT
localGPT 是一个可以在本地部署的大语言模型,并且支持离线使用的工具。它的最大优势在于所有数据都可以保持本地私有,特别适合企业部署本地的知识库。
部署 localGPT
(1) Clone Git Repo
git clone https://github.com/PromtEngineer/localGPT.git(2) 安装 Conda (miniconda即可),然后创建虚拟环境
conda create -n localGPT python=3.10.0
conda activate localGPT
(3) 在 CMD 中 cd 到本地的 git repo
cd localGPT(4) 用pip安装所有的依赖,Windows 用户有一系列的前置条件,如 Microsoft C++ Build Tools。
pip install -r requirements.txt(5) 将需要处理的文档放置到本地 git repo 路径下的 SOURCE_DOCUMENTS 文件夹。
(6) 处理数据时需要从 huggingface.co 下载模型,但该网站已被墙。可以使用 huggingface 镜像站(https://hf-mirror.com/)。Windows 环境下的解决方式是设置环境变量,加一个新的变量 HF_ENDPOINT,值为 https://hf-mirror.com。

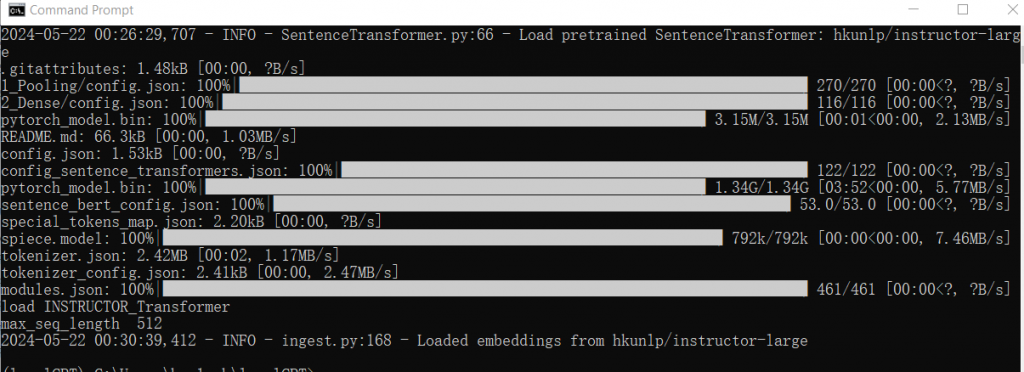
(7) 开始从本地文档中摄取数据。(指定使用cpu)
python ingest.py --device_type cpu(8) 数据处理完后界面大概如下。

(9) 在运行模型之前,需要获取 HuggingFace gated API 的 token。可以通过科学上网访问 HuggingFace 官网,注册用户并在 settings -> access tokens 里获取 token。

(10) 使用 CMD 运行模型时可能无法正常连接 HuggingFace 并下载模型。可以申请 HuggingFace 上 meta-llama/Meta-Llama-3-8B 的访问权限 (填写信息后等了半小时作用通过) ,获取权限后手动下载 Llama 到本地。具体参考 链接 下的回答。

(11) 将下载好的模型拷贝到Python目录下的 meta-llama/Meta-Llama-3-8B-Instruct 路径下,运行。

(12) 尝试向 localGPT 提问。使用 CPU 运行速度较慢,但第一次收到电脑的回答还是很神奇的。接下来可以部署 CUDA,尝试用电脑的 NVIDIA 独显(如 RTX A3000)运行模型以提高速度。
部署Cuda
关于Cuda,下面是引用Nvidia官方的介绍:
CUDA® is a parallel computing platform and programming model invented by NVIDIA. It enables dramatic increases in computing performance by harnessing the power of the graphics processing unit (GPU).
CUDA Installation Guide for Microsoft Windows (nvidia.com)
开始安装,首先在 Nvidia 官方网站下载 CUDA,链接:
CUDA Toolkit 12.5 Downloads | NVIDIA Developer
然后用 pip 下载并安装 PyTorch 的 CUDA 包,具体指令参考链接:
Start Locally | PyTorch
安装完成后,再次运行模型时,可以在任务管理器中看到 CUDA 在运行。


[…] PLOG | 巴黎不匆忙 关于我为了黑猴把显卡换成 4060 TI 这件事 Windows PC 本地搭建 localGPT(2024年5月,国内) 在大阪,保持理智 PLOG | A Trip to West Japan PLOG | March, in Manchester PLOG | […]